

I have owned quite a few radars in the past, for the price and functionality I have found that the Uniden R3 is a fantastic option! I have decided to hardwire mine using a mirror wire tap and install a direct mount that hangs just beneath the mirror. This rids you of hanging wires and gives you a very clean mounting option for your radar detector.
Here is what you will need:

Uniden R3 Radar Detector

Radar Detector Hardwire & Mount kit
Here are the tools you will need to perform the install:
First step, hop in the car and locate the rear view mirror. You will want to adjust the mirror all of the way down to allow for as much room to work as possible. Above the mirror there is a separation between the two plastic pieces that connect to the mirror, we are going to separate those with a trim tool. Use the thinnest one you have, these pop apart quite easily.


The mirror electronics should now be exposed. We are going to remove the two plugs within this assembly. One is smaller than the other, you may need to use a small pick tool to release them. Remove both plugs, it will be easier to tap into them with the plugs removed.


Within the wire tap kit, you will see two small adapter pins for the wiring. Connect those, this will allow a smaller wire tap contact so we can insert them into the the smallest plug within the mirror electronics.

Now we will tap into the smaller plug that is within the mirror electronics. The red cable from your new wiring harness will be tapping into the red/white and the black will be tapping into the brown, this is your Power (Red/White) and Ground (Brown). You are simply sliding the little pins into those spots so they join with the existing pins in the smaller plug. Done properly, they should fit snug. This connection will turn on when your mirror electronics power up and it will turn off when your mirror electronics power off.

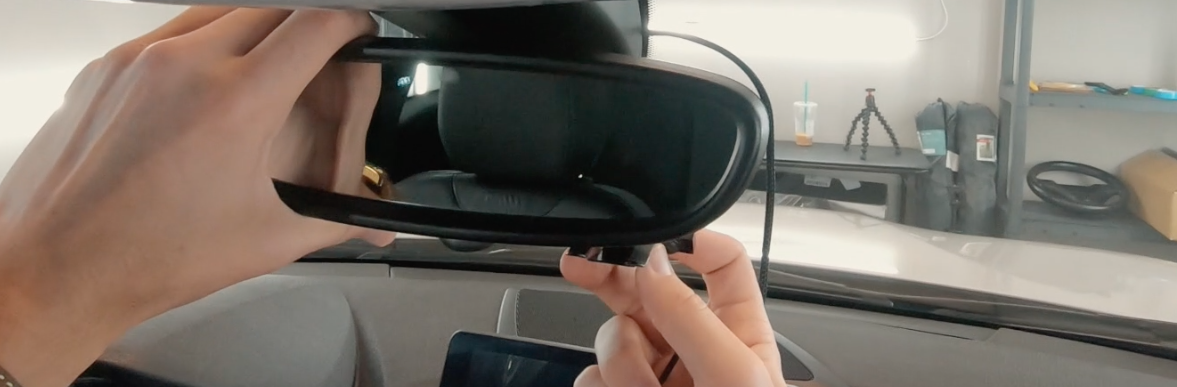
Plug the other end into your radar detector prior to buttoning back up the mirror assembly, make sure that the radar powers on. If it does, you are good and can reassemble the mirror housing. There is a small zip tie included in the package, you can zip tie the new wiring harness to the existing mirror harness, this will ensure that the plugs do not come undone and everything is nice and neat. When tucking the wires, you can have them come out either side of the mirror assembly, I personally choose to have the wires coming out of the bottom.

Now we can work on the mirror mount, assemble the mirror mount if it is not already. Keep all of the tightening knobs loose on the mount while installing, we will need to adjust things while performing the installation and mounting the radar to the actual mount itself.


Remove the two longer alan head screws. The top portion of the mount will go around the top of the mirror’s stem, while the bottom will wrap around the bottom with the two bolts clamping them into place. This is a tight fit, so move things around as needed while tightening those bolts. I have personally found, that offsetting the mount to the right is the best option for this radar to sit flush. In order to do so, the mount will not be clamped on directly straight. You will be twisting the mount at an angle facing toward 4 o4 5 o’clock. Then you can freely adjust the rest of the mount to land just under the mirror. Once you find the position you feel is best, connect your radar to the mount. Then adjust the radar to the ideal position and tighten all of the levers down.


And that is it, you are finished!
If you would like to watch my full video install you can do so here: