
If you have an older F30 BMW you likely are running the older headunit as well. It is surrounded by plastic and has a small screen, it just looks bad and in my particular model I did not have a backup camera. This was something that I really wished I had purchased with the car when I first bought it.
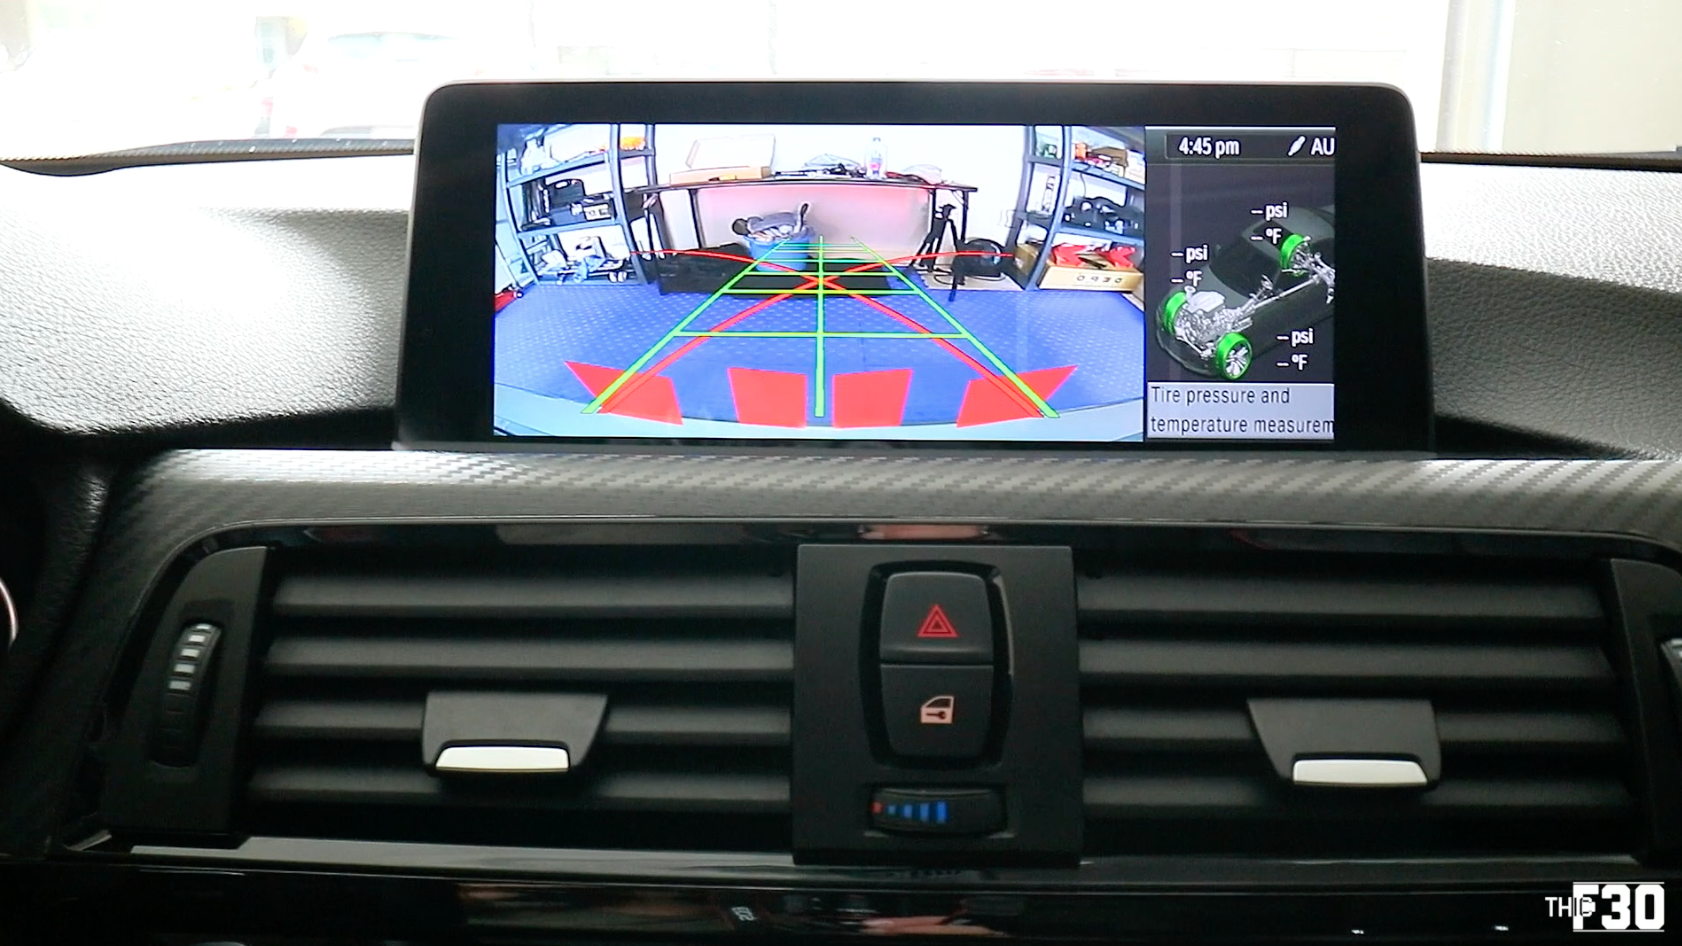
Bimmertech makes a kit for us to retrofit the larger screen as well as a backup camera. A all in package that is super easy to install and does the job. The finished product is oem quality and looks fantastic.
You can purchase the kit I went with
This install is quite simple, I will lead you through the process.
Here are the tools needed:
First step, make sure you have everything and that none of the parts were damaged in shipping. I like to lay everything out in front of me for every install job.
Next, disconnect your neg terminal on your battery (10mm Socket located in trunk) I like to place a towel underneath the terminal once removed.


Next we will remove the top trim piece on our dashboard. No tools needed, this is held in by a series of clips. Be careful not to break them, start on the thicker side and move over to thinner passenger side.

There are two connections in the back, one for door lock and one for caution lights. Remove both and set the trim piece to the side.

Next remove the accessory trim piece in the center of your dash. This houses the Ac control unit, etc. Use the T20 torx bit to remove the 4 screws. The lower tray underneath the trim can be dropped with a trim tool. Once all 4 T20’s are out, you can unplug the connections behind it and set the AC panel to the side.


You will now have access to the center control unit, this is held in by two T20’s. Remove those and place the unit on a microfiber towel.


You will notice a big black connection behind the unit, we need to remove this. The locking mechanism works with a lever. Pull lever up and it releases the connection.
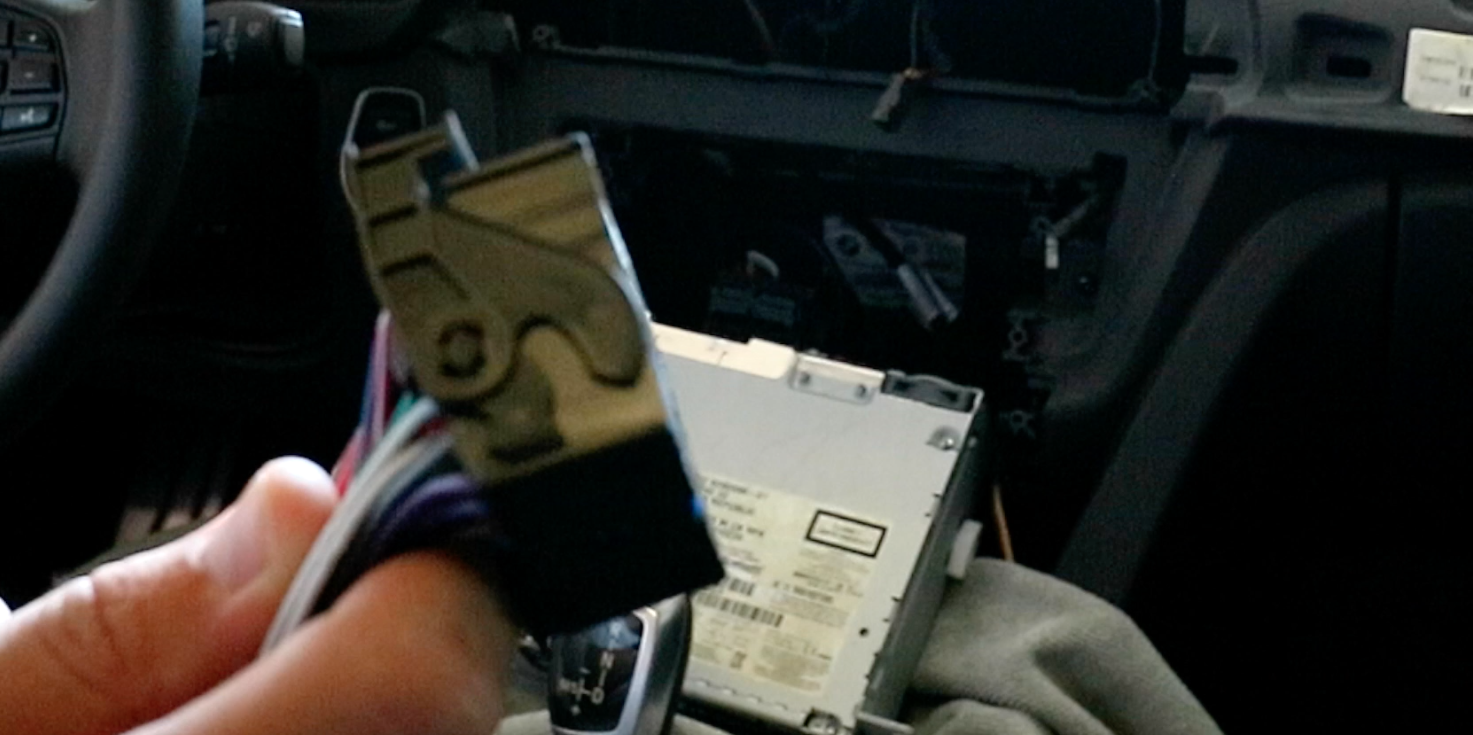
Now we take the female side of the harness supplied by bimmertech and connect it to the factory male harness we just removed from the unit.

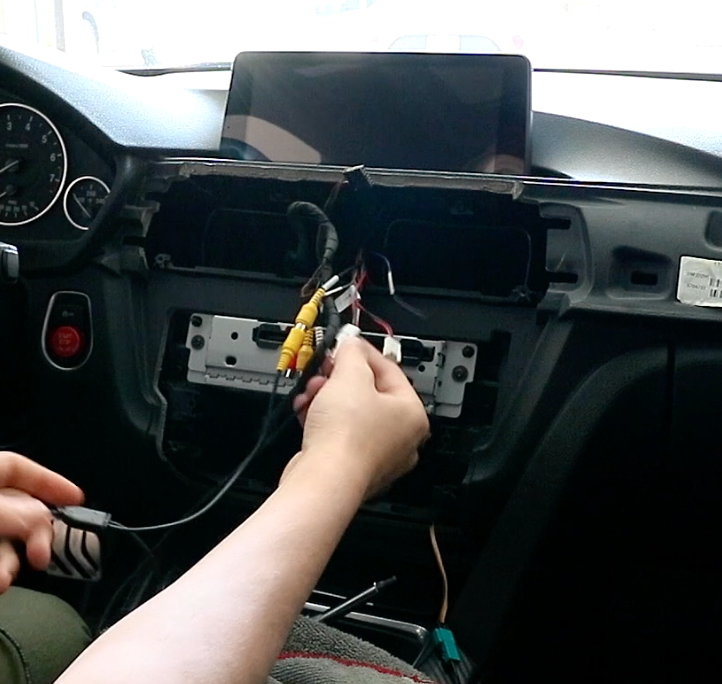
You will see a smaller white connection coming out of your new harness. This is going to run up into your new headunit. So you will need to run that up in between the two air vents in order to access the new screen.

Now is a good time to remove your stock screen. it is held in by two T20 torx and there are a series of connections in the back. Remove all connections and pull out the screen. Check out the differences in the screens!


You will see another two black USB connectors. These are for Apple TV should you choose to install that as well. We are not so they will just be tucked away.

We will connect the rear backup cam cables now. There are two cables coming off of your new harness, they are both labeled “Rear Cam” Yellow goes to yellow white goes to white.

For this next part, you need to run the black cable all the way into the trunk. Best way to do this: Through the underside of the glove compartment, under the door sills, through the back seats and into the trunk lid. This is where the backup cam will be install (It replaces your trunk handle)
Run your cables, remove the handle in the trunk and install your new backup cam. Make sure everything is connected and plugged in. For details on this watch this VIDEO.
Once you are finished there, it is time to reassemble everything up front. Don’t forget any T20 screws and follow your pin instructions in the manual you have received (every car is different)
For some older models (Mine for example) there is a bit of stretch that unfortunately cannot be resolved. If you are 2014 and up you likely can code out the stretch.

Other than that, this is a fairly easy install. The new screen is much nicer and having a backup camera is a must! Check out my full video install here: