

Today we are installing the carbon fiber M style mirror caps along with the smoked out sequential blinkers. The carbon is just an overall better look for the M2 and the M style suits the car’s aggression quite well. The stock mirror blinkers are halogen and the cover is clear. I like to black most of the chrome and clear out on my builds, these new sequential blinkers are LED and blink in the form of a sequential blinker. So rather than a pulse, they draw in and out, in and out. This is a simple upgrade that makes a massive difference.
You can purchase the Carbon Mirror Caps HERE. And the Smoked Sequential LED Blinkers HERE.
Here are the tools we will need for this install:
First step, we will be unclipping the mirror glass from the mirror cap housing. There is circular disc that has clips in it holding the glass into place. Tilt your mirror all of the way back (Use the electronic Mirror tilt function inside of the car on your drivers side door card)
Take your widest trim tool, we will be prying near the center while holding our hand on the surface of the glass. Spread your hand as wide as possible to cover as much glass as you can and pry up. Be careful here, its easy to crack the glass. If you are doing this in a cold environment I suggest waiting until it is warm.
Once you remove the glass, place a towel between the glass and the car door so it can hang without scratching your car.


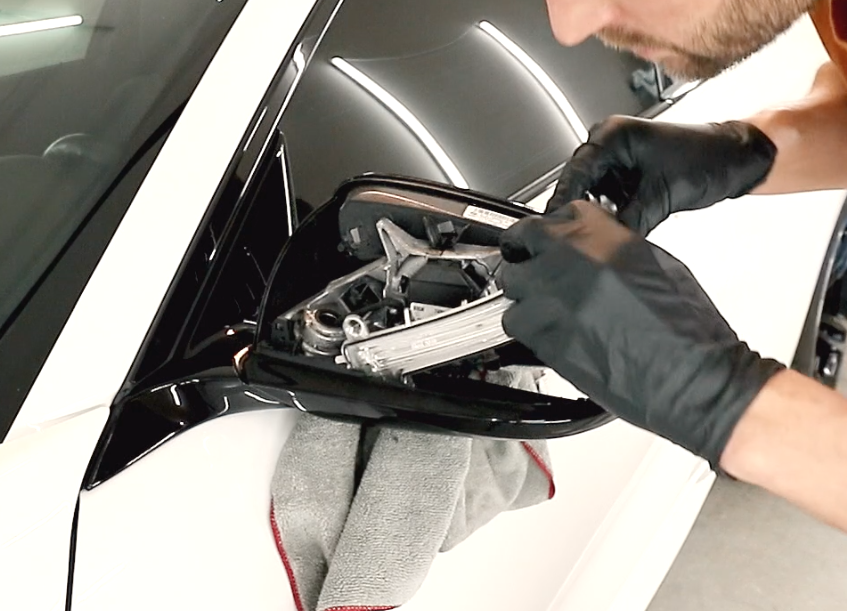
Your mirror cap will either be held in by 3 T10 torx screws or 3 pinch clips. Mine was held in by the screws, remove those or pinch and push the clips to release the cap. Pull the cap off of the mirror cap housing.


We will now remove the mirror turn signal. There are 4 T10’s. Three along the bottom of the inside of the mirror housing and one on the outer housing.


You can now pull down the entire bottom portion of the mirror assembly housing and release the turn signal housing. Once you remove the turn signal you will want to unplug the tiny connector inside.

Plug your new Sequential Blinker in and reinstall it the same way that you removed it, remember to fasten the 4 T10’s.


Now we will install the new carbon fiber mirror cap, line up all of the clips from the frontside of the mirror assembly. Make sure to peek into the back of the housing to see that the clips are coming through in the appropriate holes. Once everything is lined up, apply pressure to the entire cap until the clips fully seat into the mirror assembly.


Now we can reinstall the glass. Line the glass up with the circular disc that it clips into. Apply pressure evenly throughout the entire glass until you hear it clip into place. Try not to press to hard on only one side, again..super easy to crack this glass.
Repeat the same process for the other side and you are finished!


If you would like to watch the video of this install, you can do so here: