

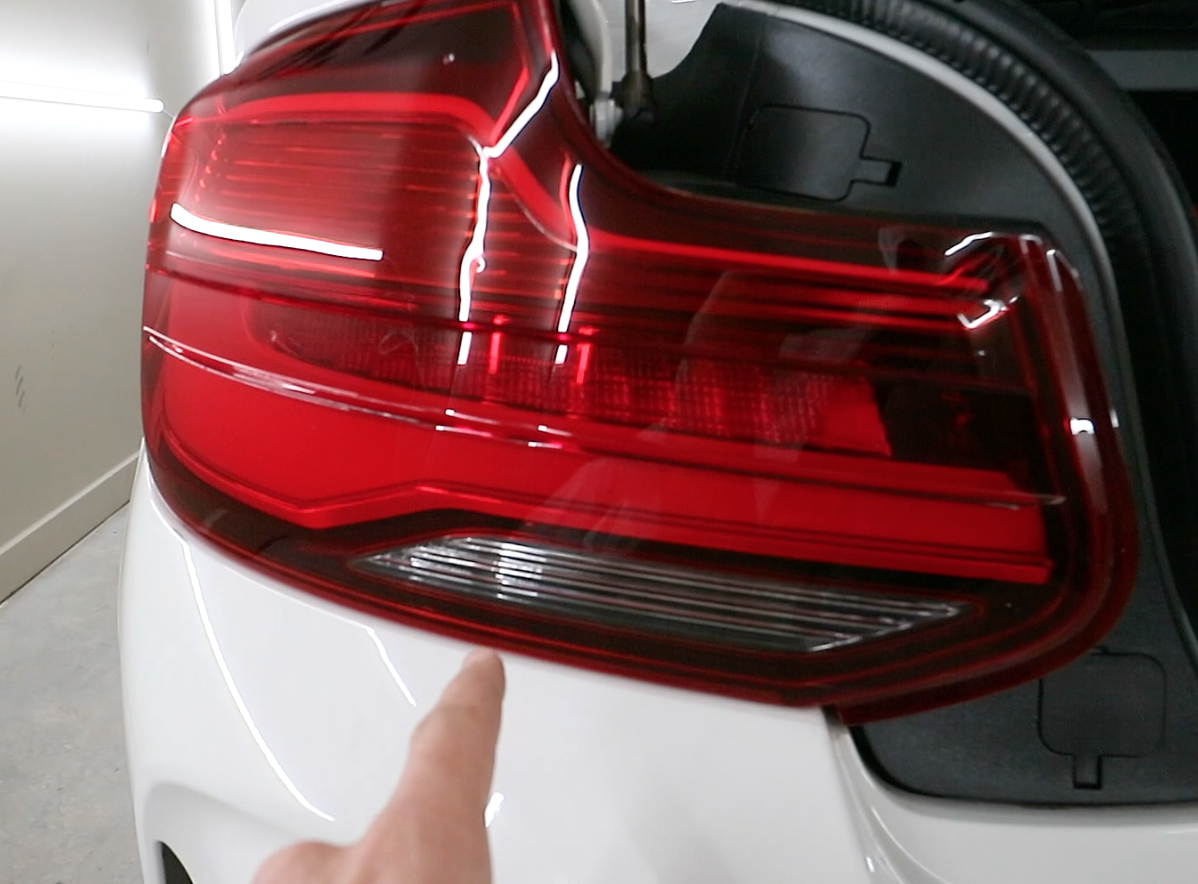
The M2 LCI Tail Light conversion makes a massive difference to the rear presence of the F87. This is a relatively cheap upgrade and can be done in about an hour with the proper tools. I highly suggest this for anyone running pre-Lci. For a full video on the install you can watch that HERE or simply read the steps below.
Here is everything you will need to perform this conversion:

Oem Lci Right Tail Light - Part # 63217420994

6 Pin Plugs (You Will Need Two) - Part # 61132359993

Oem Lci Left Tail Light - Part# 63217420993

LED Reverse Bulbs (Optional)
Tools Needed for this job:
A pick tool, you can purchase that HERE.
10mm Socket Buy Here
Electrical Tape Buy Here
Note: this will require some coding. You can use bimmercode to do this or contact a professional. Please watch the full video install for the coding portion of this video HERE.
First step is to remove the Pre-Lci Tail Lights. (lets start with the left light - Drivers side - first) There are 4 10mm nuts (2 on each tail light) You will see two plastic flap like covers. Open those to expose the 10mm nuts.


Next remove the 10mm nuts, with one hand on the edge of the tail light and one hand on the back of the tail light. Remove the tail light. This may take some force, be very careful to not scratch your paint. You may want to line the bumper and quarter panel around the light with painters tape if you are nervous.
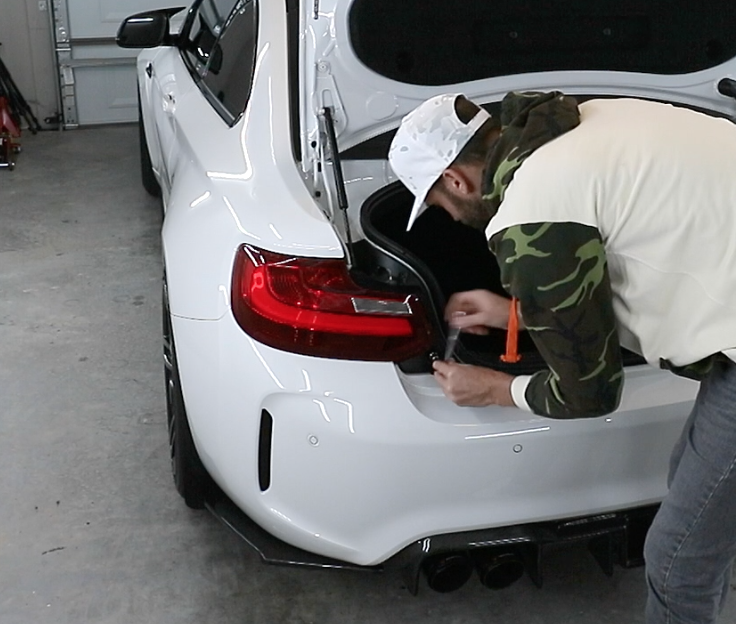

Now that the tail light is out, you will need to disconnect all of the plugs from the harness to the tail light. Mine has two, yours possibly has one OR two depending on year and/or model. The harness with the 8 wires going into it is the one we will be repining into a 6 pin connector (discarding 2 wires) and the smaller plug one the left with the two brown wires will be discarded, tape that off and it will be tucked away behind the tail light.

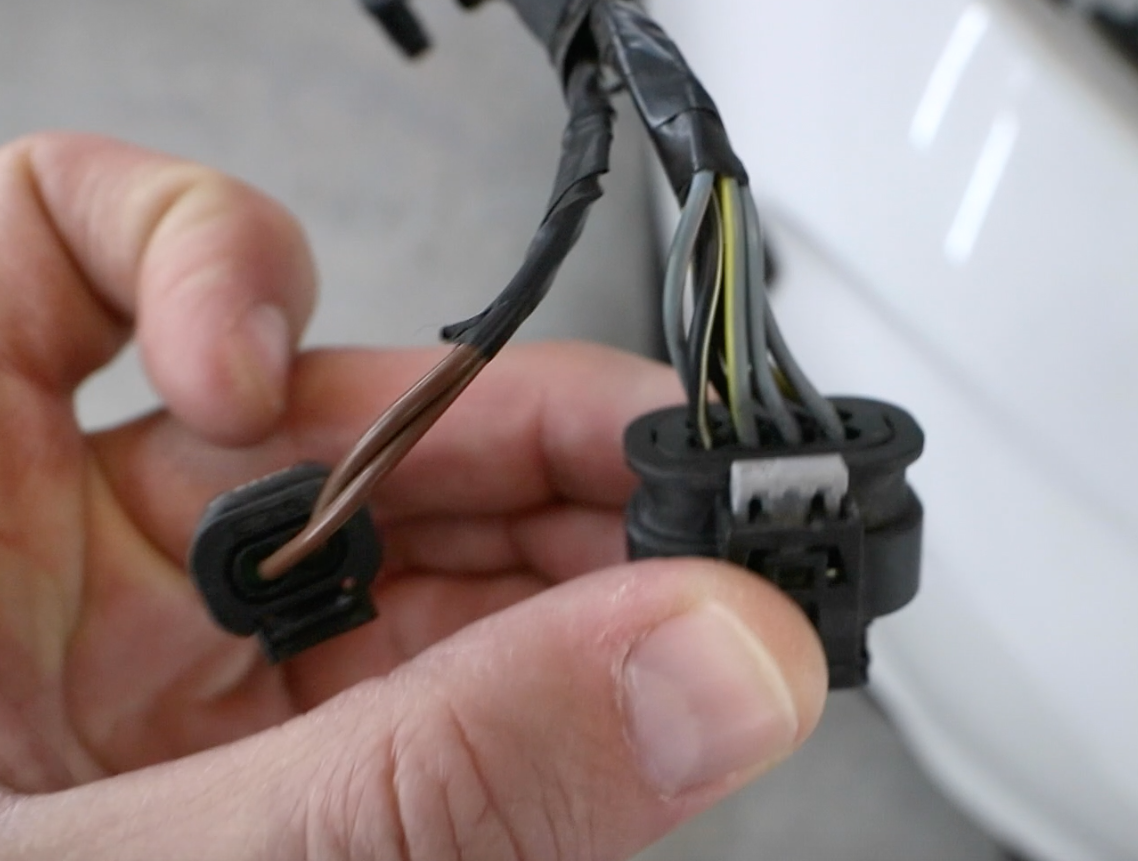
Next we will be removing the pins that we will be reusing for the 6 pin connector. In order to do this, take your pick tool and gently press down on the silver tabs. Then take the pin tool and insert it into each pin’s plug hole to push the pin out of the back of the connector. For the driver’s side light, you will be removing all BUT the Black/yellow wire and the yellow/black wire. These two will remain the in the old connector. You can either wrap this connector up and tuck it behind the tail light (This is what I did) or you can cut the wires, cap them off and remove the 8 pin connector all together.


Now comes the Pin-out portion of the install for the driver’s side light. Follow these instructions:
Pre-LCI Left:
Pin 1 Gray / Blue = Reversing Light
Pin 2 Gray / Violet = LED Bar
Pin 3 Gray / Yellow = Fog Light
Pin 4 Black / White = Turn Signal
Pin 5 Yellow / Black = Brake Light (Not being used in LCI)
Pin 6 Brown = Ground (-)
Pin 7 Black / Yellow = Brake Light (Not being used in LCI)
Pin 8 Gray / Pink = BFD/Brake Light
INTO
LCI Left:
Pin 1 Gray / Pink = BFD/Brake Light
Pin 2 Black / White = Turn Signal
Pin 3 Brown = Ground (-)
Pin 4 Gray / Violet = LED Bar
Pin 5 Gray / Blue = Reversing Light
Pin 6 Gray / Yellow = Fog Light
This part can be a bit confusing. Here is what your new connector should look like:

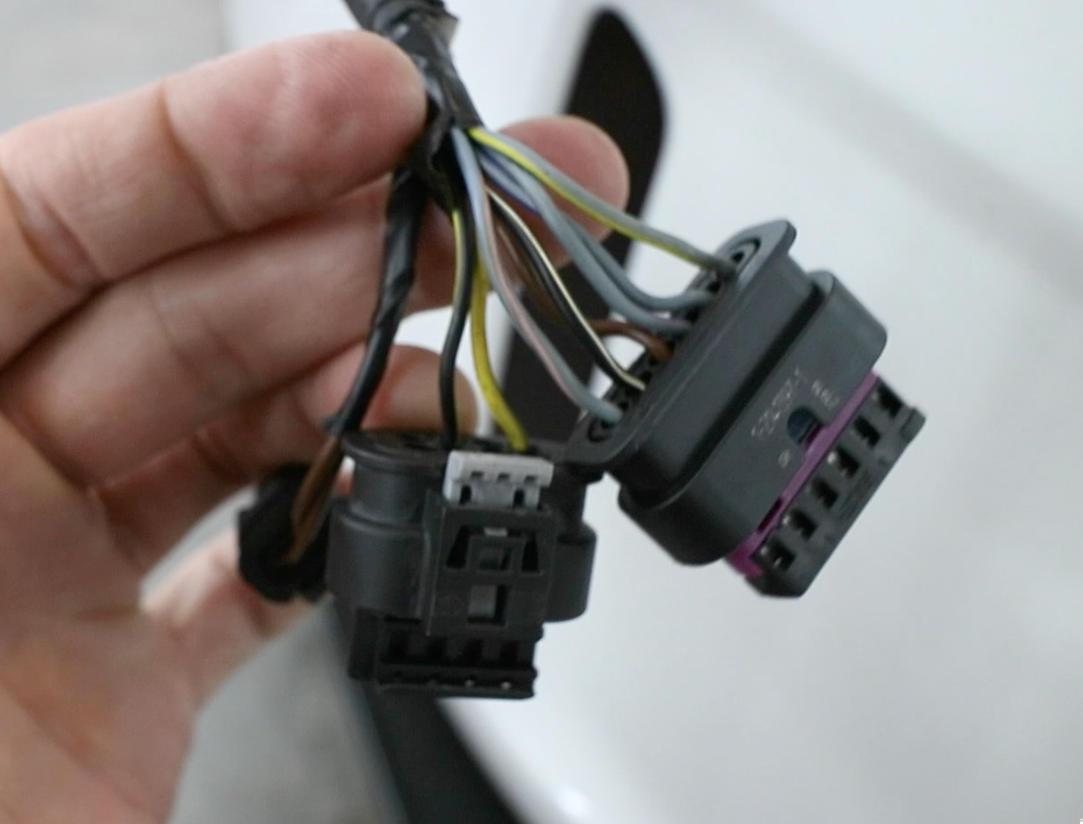
This side is finished, make sure to insert each pin in the proper orientation, it should click into place. Once all pins are inserted slide the purple piece over to lock all of those pins into place. Plug the new 6 pin connector into your LCI tail light and tuck the other two behind the tail light. Install LCI tail light the same way to removed the pre lci tail light and fasten the two 10mm nuts. Half way home..

Now we move onto the passenger side. Remove the tail light, remove the harnesses..you know the deal. Once the pins are exposed you will want to follow the same procedure but with this pinout formula:
Pre-LCI Right:
Pin 1 Black / Gray = Turn Signal
Pin 2 Gray / Yellow = Fog Light
Pin 3 Gray / Black = LED Bar
Pin 4 Gray / Blue = Reversing Light
Pin 5 Gray / Pink = BFD/Brake Light
Pin 6 Black / Blue = Brake Light
Pin 7 Brown = Ground (-)
Pin 8 Yellow / Violet = Brake Light
INTO
LCI Right:
Pin 1 Gray / Pink = BFD/Brake Light
Pin 2 Black / Gray = Turn Signal
Pin 3 Brown = Ground (-)
Pin 4 Gray / Black = LED Bar
Pin 5 Gray / Blue = Reversing Light
Pin 6 Gray / Yellow = Fog Light
Your connector should look like this once pinned correctly (Ignore my red wire taps, these are for my rain light diffuser):


Reinstall plugs, (remember the locking purple clip) then reinstall the passenger tail light. We are finished with this portion of the install. Take a second and witness the greatness of LCI. These also have much more contour to them..V NICE. :)


Now its time to code the car so we can run the lights without throwing errors or codes on the dash. We are using BIMMERCODE to do this. I have a discount code for anyone needing an adapter for bimmercode, you can find that info HERE.


In bimmercode, you are going to be coding ALL lights in the rear electronic module to have LED type bulbs, warm monitoring off and cold monitoring off. Code these functions, then move onto the next coding phase.
Head into Expert Mode and find category 3062. Change the values to the following:
3062 LceLampMapping1:
MAPPING_BREMSL_L_PWM_LEVEL_1 = 13.7V (89)
MAPPING_BREMSL_R_PWM_LEVEL_1 = 13.7V (89)
MAPPING_BRAKEFORCED_L_PWM_LEVEL_1 = 13.7V (89)
MAPPING_BRAKEFORCED_R_PWM_LEVEL_1 = 13.7V (89)
MAPPING_BLINKER_H_L_PWM_LEVEL_1 = 13.7V (89)
MAPPING_BLINKER_H_R_PWM_LEVEL_1 = 13.7V (89)
Next we will head into 3063, change the values to the following:
3063 LceLampMapping2:
MAPPING_NEBELSCHLUSSL_L_PWM_LEVEL_1 = 13.7V (89)
MAPPING_NEBELSCHLUSSL_R_PWM_LEVEL_1 = 13.7V (89)
We are finished!


I can confidently say, the difference is remarkable. Originally this was a modification that I did not plan on doing. Once I decided to bite the bullet, I was very glad that I did. Not only does it bring your car up to date look wise but the light output in the LED’s is far better than that of the old halogens. This is a must-have upgrade for our 2 series bmw’s in my book.
If you are more of a “Visual” person when it comes to these type of installs, feel free to check out my full video here: